Gamma Radiography with Iridium192
Journal Archive
Gamma Radiography with Iridium192
Advantages In The Non-Destructive Testing Of Castings And Welded Structures
Gamma radiography was introduced twenty years or so ago as a supplement to X-ray radiography to provide a means of inspecting castings, welded assemblies and other engineering structures for internal defects such as blowholes and cracks. This method of nondestructive testing has been developed alongside X-ray inspection and in general has been of special service where
radiographic examination has to be carried out in positions that would be inaccessible to bulky X-ray apparatus
relatively thick and dense metal parts are to be examined, since these would normally be beyond the range of ordinary X-ray equipment, the radiation from which is generally less penetrating than that from the gamma ray sources so far employed.
Originally the source of radiation was of course a naturally radioactive material. In the early days of gamma radiography it was usual to employ either permanently active sealed radium sources or short-lived sources filled with the radioactive gas radon drawn from a radium source. The radiation emitted from radium or radon is of a strongly penetrating character and experience showed that it was particularly suitable for the examination of thick castings of steel or copper alloys.
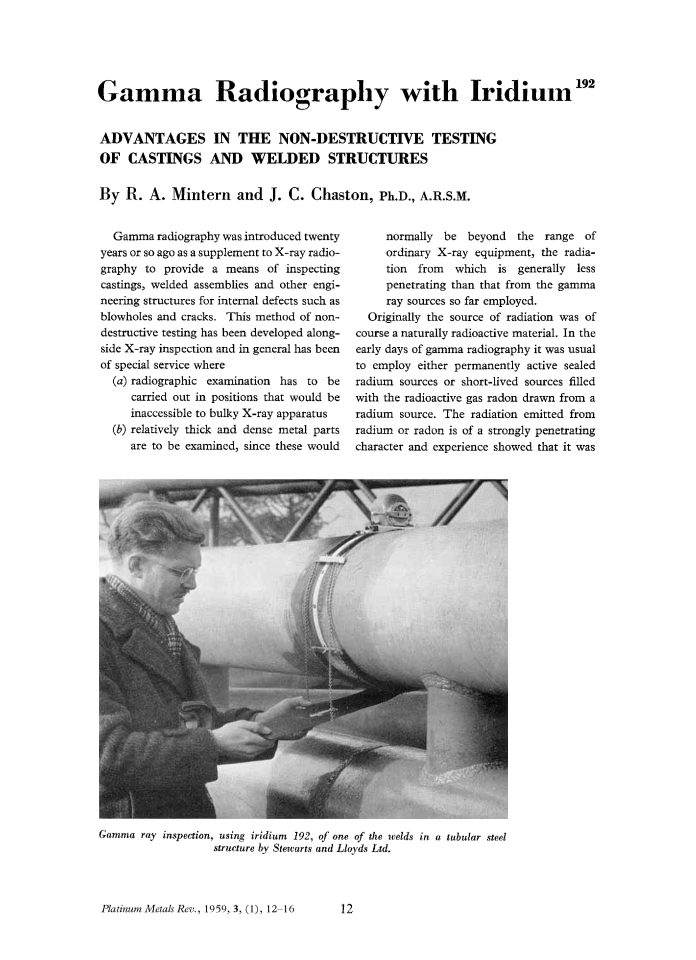
Gamma ray inspection, using iridium 192, of one of the welds in a tubular steel structure by Stewarts and Lloyds Ltd.
Both these sources are still available but, since radioactive isotopes made artificially by irradiation in an atomic pile have become available, it has been more customary to employ cobalt 60, which is an isotope of relatively long half life (5.3 years) and has proved a most attractive alternative to radium. The radiation emitted from cobalt 60 approximates to X-radiation generated at
More recently other radioactive isotopes have become available, including iridium 192, tantalum 182, caesium 137 and thulium 170. Of all these, the isotope iridium 192 has been found to have many particularly attractive characteristics. It is prepared by a neutrongamma reaction which takes place when a sample of metallic iridium of the required shape is inserted in the atomic pile. At the same time iridium 194 is also produced but, as this has a half life of only 19 hours, the radiation from this isotope becomes negligible at the end of about one week. Iridium 192 which then remains, has a half life of 74.4 days.
Gamma Ray Spectrum of Iridium 192
Energy of Spectrum Line (MeV) | Relative Intensity |
---|---|
0.207 | 1 |
0.206 | 7.5 |
0.296 | 38 |
0.308 | 37 |
0.316 | 100 |
0.468 | 30 |
0.485 | 1.1 |
0.588 | 1.1 |
0.605 | 1.4 |
0.613 | 0.5 |
An iridium 192 source in use for the non-destructive testing of a welded steel shell at the works of G. A. Harvey & Co. (London) Ltd.
The nature of the radiation emitted by iridium 192 has been discussed by R. Halmshaw (1) who points out that the energy distribution in the gamma ray spectrum is complex and is probably not far removed from that quoted by Muller (2) and his colleagues and shown in the table.
The work of Halmshaw suggests that a slightly larger proportion of the higher energy spectrum lines than are indicated by this table may be present, and from experiments with exposure curves he concludes that the radiation from iridium 192 is roughly equivalent to that from an X-ray tube running at a peak voltage of 800 to 900 kV.
From theoretical reasoning it is very difficult to compare the value of different sources of gamma radiation, but Halmshaw has shown that the radiation from iridium 192 is, as would be expected, inferior to 200 kV or 400 kV X-rays for detection of fine cracks, but that the flaw sensitivity, when considered in terms of contrast alone, is actually comparable with 400 kV X-rays for thicknesses from I
Typical exposure charts for steel and lead for use in gamma radiography with iridium 192. (In this case the film source distance was 18 inches, the film used was Ilford F, developed in PQX1 for six minutes at 68°F to an image density of 1.75)
More recently, W. H. Sansom (3) has confirmed from considerable experience that there is “a relatively high, and rather unexpected, degree of image contrast obtained when radiographing comparatively thin sections of steel [with iridium 192]—even down to 7 lb plate, which, with reinforcement, is approximately
He further points out that “it may be said from experience, with some degree of certainty, that, in spite of the considerably longer exposures necessary with an iridium 192 source of medium or low strength (the exposure times with a high-strength source may be very close to the corresponding X-ray exposure), the actual volume of work over a given period is little different from that achieved by the use of X-rays—in some cases, it may actually be higher. This comparison is set in terms of a relatively small department with a staff of three or, at the most, four operators working each unit. The reason for this is to be found in the great bulk and weight of an X-ray unit, with its necessary ancillary services of coolant and power, as compared to an isotope container or bomb”.
Radiographic Technique
In order to derive the full advantage from the use of a gamma-ray source of iridium 192 it is important that attention should be given to all details of radiographic technique.
For a radiograph to give the maximum information the exposure given must be sufficient to penetrate the thickest part of the object and to produce a good density on the film when developed. Film processing must be closely controlled to obtain the maximum contrast and minimum graininess, but this is comparatively easy compared with determining the correct exposure required. The exposure time will depend on the strength of the source, the distance it is placed from the film, the thickness, density and atomic number of the material being radiographed and the speed of the film, but the relationship is complicated and is best dealt with by preparing an exposure chart.
Exposure Charts
An exposure chart prepared for steel will be of general use for copper and its alloys.
The method usually employed for making an exposure chart is to take a series of radiographs of a step-wedge of the metal concerned at the same distance from the source for different exposure times. The wedge used to produce the figures for the steel graph shown here consisted of strips of
A further series of exposures was made with a lead step-wedge to illustrate the effect of increased density and atomic number. The slope of the curves is very different for thin sections, lead requiring much greater increase in exposure between
Protection of Operators
It is important that radio-active isotopes should be handled in such a way that radiation received by operators is kept to a minimum. A check should be kept on the amount of radiation received by carrying film badges or ionisation chambers. The maximum permissible dose from iridium 192 for continuous working is 0.3 röntgens per week. The radiation from an unshielded source is 0.5 milli-röntgens/hour/milli-curie. A 2-curie radiographic source would therefore give a week’s radiation in 20 minutes at a distance of one metre.
Availability of Sources
Iridium sources are available from the Atomic Energy Research Establishment, Harwell, in four standard sizes in the form of cylinders with their length equal to their diameter, the sizes being 6 × 6 mm, 4 × 4 mm, 2 × 2 mm and 1 × 1 mm, and also as wire 1 mm diameter and as foil 0.05 inch thick.
References
- 1
R. Halmshaw The Use and Scope of Iridium 192 for the Radiography of Steel, Brit. J. Appl. Physics, 1954, 5, 238 – 243
- 2
D. E. Muller,, H. C. Hoyt, D. J. Klein and J. W. M. DuMond Precision Measurements of Nuclear Gamma Ray Wave Lengths, Phys. Rev., 1952, 88, 775 – 793
- 3
W. H. Sansom Some Reflections on the use of Radioisotopes in Industrial Radiography, Shipbuilder, 1957, 64 329 – 333